Google My Business or Google Business Profile is a free and easy-to-use tool for businesses, brands, artists, services and organizations to manage their online presence across Google, including Search and Google Maps.
By creating a Google business page and verifying business information, you can control your business name, hours, contact information, photos, and much more.
If you are trying to figure out how to add your shop or business to Google or Google Maps then this blog is aimed at giving you every detail possible on how to create a Google Business page.
Why is creating Google Business Page Important For a Local Business?
Considering that local company searches make up 45% of all Google searches, creating a Google Business Profile or listing is crucial for your business to be found online.
97% of people, according to HubSpot, searched online to find a local business and of these, 61% called and 57% visited the business.
You’ve probably noticed the three businesses that show up in the search results box at the top of the page, along with a map and dropped pins. Naturally, they receive more clicks and customers than any other similar businesses or listings that are displayed further down the page.
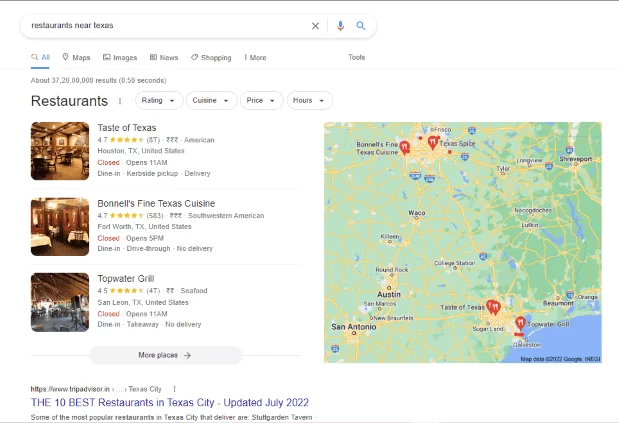
If you are wondering how to rank higher on Google Map then the first step is creating a Google Business Profile.
Even though it appears that the procedure of adding business to Google should be as straightforward as “step one produce, step two claim, and step three verify,” it is neither that straightforward nor that simple.
You may create a Google business page most effectively by following these detailed instructions.
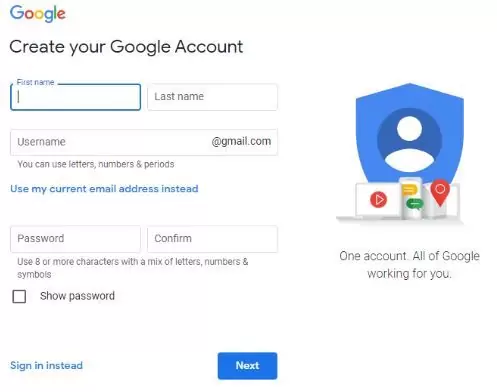
Step #1: Create a Google Account (Gmail)
You must first create a Google Account in order to build a Google local listing. This is the free Google account you register for to use Google Docs, Google Drive, Google Photos, and other services.
Although many of you already may have a google account or Gmail account, it is advised to create a separate one for your business rather than using your personal mail id.
To create a google account go to https://accounts.google.com/signin and click create account
Step #2: Head Over to Google Business Profile Portal
Once you have created a google account now it’s time to create a Google business Listing. For that, you need to go to google.com/business and click “Manage now”.
Remember a Google account and a Google business listing are two different things. You should not get confused while creating.

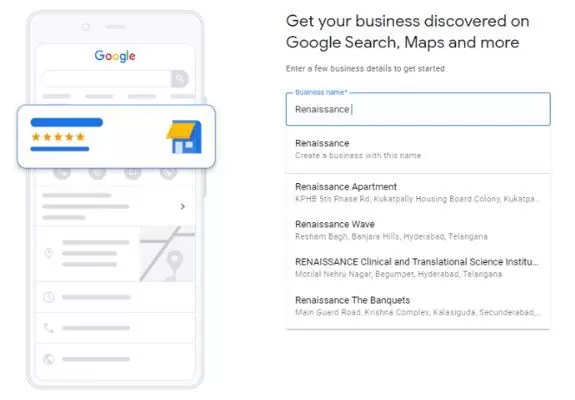
Step #3: Search For The Business You Want To Add
Enter your business name to find out if the business is already listed or claimed by someone.
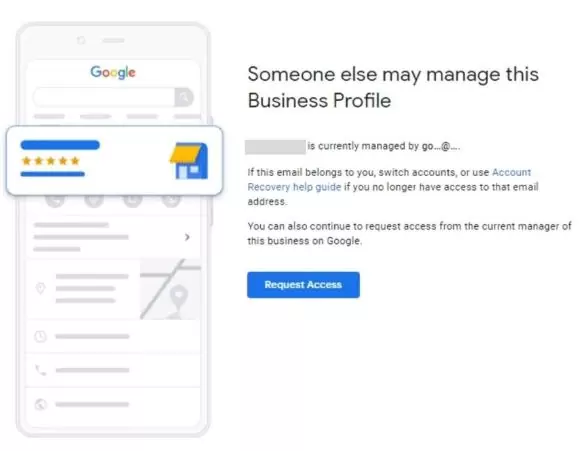
There’s a high chance your business profile already exists, even if you didn’t create it. This is true because a business profile is just a location that anyone with a computer or other device may add to Google Maps.
You shouldn’t be concerned if your business already has a Google Business Profile and it is not created by you. You have the option to ask to take control of the profile. Click on “Request Access” and follow the instructions.
If you don’t find your business listed then you can choose to create a new listing by entering your business name. The next step looks something like this.
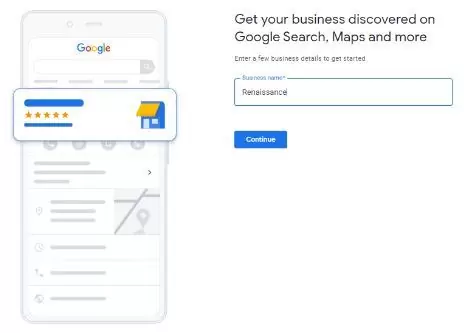
Note: The name you give here must be an exact match to your company’s legal name. Avoid the temptation to include any keywords in the name because Google guideline prohibits this.
Step #4: Choose The Right Business Type
This is an extremely important part of your google business profile creation where most people makes mistake.
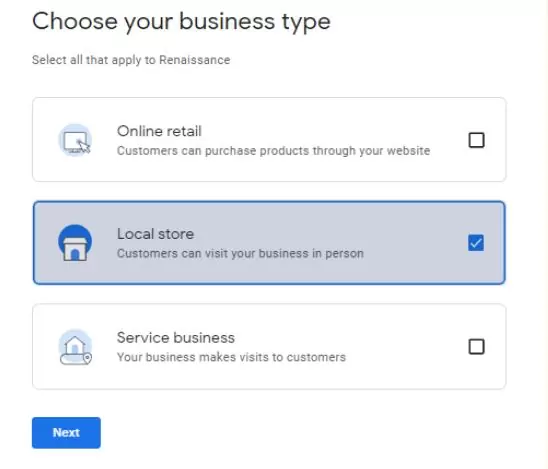
If you are a brick and mortar business or your business offers a physical store visit like a Restaurant or a Dentist then you should opt for a local store.
If the business is a service and serves an area or visits customers to fulfill the requirement like a Plumber or a Roofing service provider, then you must choose the service business option. If you offer both the store and on site services then Google now lets you choose both the types.
Caution: Avoid the temptation to falsely claim that the company has a physical location in an effort to manipulate local rankings. Due to this violation of the rules, the listing could be suspended or even deleted in the future. Check Google’s guideline if you have any confusion in choosing your business type.
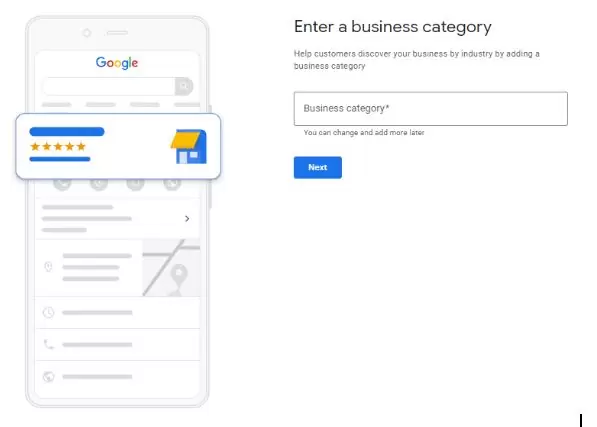
Step #5: Choose Your Business Category
The next step is to enter the category of your business and make sure you choose a category that closely matches your business. Select the category that best describes the business next. Don’t worry if you’re not entirely sure what to choose just yet. You’ll have the chance to update this within the profile later, as well as to add more categories.
You may use a tool like GMB Spy to spy on your competitors to find out what is the primary and secondary categories they have mentioned on their listing.
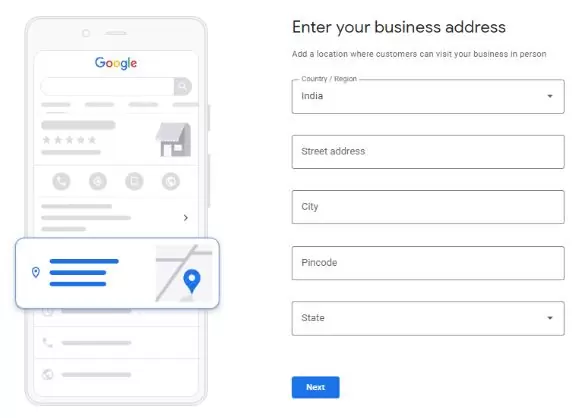
Step #6: Enter your location Address
If you have a physical location enter your address and make sure that you enter the correct and precise information. You might be requested to place a pin on the map to verify the location. If you are a service business without a physical location or you don’t want to show your address then you may choose the option of hiding your location address.
Choose Your Service Area (Applicable to Service Area Businesses)
If your business is a service based in nature, visiting or delivering products and services to customer locations then you need to add the area you are serving.
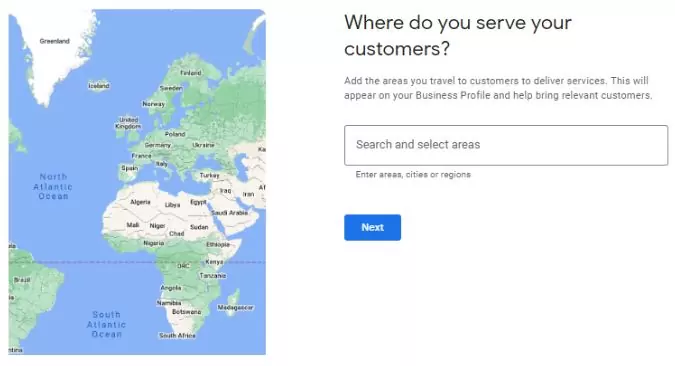
You can choose your service area based on city, county, state, Zip code etc
For example, if you are a Roofing company based out in Texas and if you provide service in multiple locations then you can mention it like
- Plano, Tx
- Garland, Tx
- Dallas, Tx
- Richardson, Tx
..and so on.
If you are serving an entire city you can mention the city name instead of listing out each zip code.
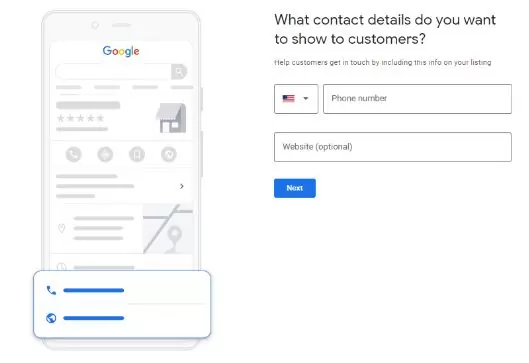
Step #7: Enter Your Business Contact Details
It’s time to enter your contact details so customers can reach out to you. Choose the country code and then enter the phone number you want to be displayed.
If you have a website enter the URL of your website in the dedicated column. Don’t worry if you don’t have one. Google Business Profile comes with a free website option which you can set up later if needed.
We are almost done with the google my business account creation! But don’t get excited, it’s not yet over!
In the next step, you’ll be asked if you want to receive helpful hints and recommendations from Google before proceeding to validate the business. It’s up to you to accept this information, but you might find it useful.
Once you are done with the Google business page or Google Business Profile (GMB) set up now it’s time for verifying your listing.
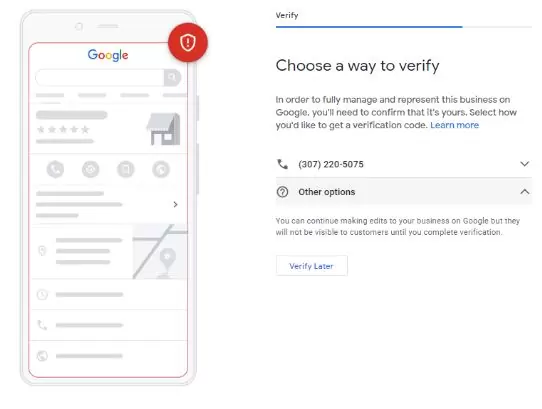
How To Verify A Google Business Profile?
After creating a new Google business page or claiming an existing one, It is extremely important to verify it because you won’t be able to access the majority of its options or services without a verification. Also your chances of going up in the local map pack or ranking will be reduced as compared to a competitor’s verified listing.
Google will give you different verification options which may include an email, a postcard, a video or even in some cases an instant verification depends on your business type and location.
If you are a multi-location business and if you need to verify more than a single location then you can opt for a bulk verification process as well.
Verifying Google Business Profile With A Postcard
- Make sure to enter your contact name and address precisely, including the whole street name and zip code.
- Click ‘Request Postcard’.
- Wait for the arrival of your postcard which may take anywhere between 5-14 days. Once you receive the postcard, log in to your business listing and select Verify Location from the menu or the Verify Now option if it is present, and then enter the five-digit code from your postcard.
Warning: While you’re waiting for your verification postcard, Google advises against changing your business’ name, address, category, or asking for a new code.
If something goes wrong then it is going to be a difficult task (calling google customer support ) to get your listing verified.
Verifying Over Phone or Email
If your business is eligible for phone verification then
- Choose the option: Verify by phone
- Enter the phone number to receive the code
- Choose a call or text option
- Enter the six-digit code you received and click verify.
Email:
- Choose the email option if it is available
- Enter your associated email id
- Follow the instructions provided
Verify Listing Using Video Recording / Video Call
To verify your business using a video recording or a video call you must be present at your location.
Video recording
- Record a video of your business including street view, street sign, business sign board, interior and exterior of your business premises and unlocking the door with your key.
- Upload the video and wait for the verification process to be completed.
Live Video call
- Click on verify via a video call option
- Start video call > follow the instructions provided by the support executive.
Note: You must be present at the location for a video call verification.
You can confirm if your business listing has been validated, by signing into your Google Business Profile account. You’ll be able to access all features and see the dashboard if your listing has been confirmed.
If your listing isn’t verified, then the alternatives for verification will be visible.
If no alternatives for verification are presented to you, you may instead see a notification stating that the profile has already been validated by someone else!
In that case, you must use the ‘request ownership’ option to send an email to the other party, who has claimed your business, asking them to get in touch with you. Then, that person can accept or reject your request.
If the party doesn’t respond or reject your request, a link will be included in your ownership request email that will guide you through a verification procedure.
Depending on the verification methods offered for your firm, verification can take some time to complete. So it is important to start the process as soon as you can.
That’s it, You’re all set!
Hope this guide will help you to set up your GMB with ease.
FAQ
Most frequent questions and answers
Yes, creating a Business Profile on Google is absolutely free of charge. Google offers this service to help businesses showcase their information and connect with customers without any cost.
No, Google My Business is completely free to use. There are no hidden charges or subscription fees associated with creating or managing your Business Profile through this platform.
Yes, Google My Business allows you to manage multiple business locations from a single account. This is particularly useful for businesses with multiple branches or stores.
Google My Business provides a range of features to help you manage your online presence, such as updating business information, posting updates, responding to customer reviews, adding photos, and viewing insights about how customers interact with your profile.
No, you don’t need any advanced technical skills to create a Business Profile on Google. The process is designed to be user-friendly and intuitive, guiding you through the steps to set up your profile.
Yes, you can edit your Business Profile at any time. If your business information changes, such as your operating hours or phone number, you can log in to your Google My Business account and make the necessary updates.
After you’ve created and verified your Business Profile, it typically takes a few days for your information to appear on Google Search and Maps. Google may need some time to process and validate the information.
Yes, Google has guidelines and policies for creating and managing Business Profiles. These guidelines ensure that the information provided is accurate, relevant, and meets Google’s standards. Make sure to follow these guidelines to maintain a positive online presence.